
TL;DR
Moving your rig into another room or closet dramatically reduces noise and heat issues. Proper ventilation is key for closet setups, and understanding the difference between soundproofing and dampening helps you make smarter improvements.
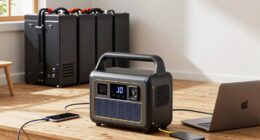
Ever had a loud, whirling AI rig interrupt your focus? Or wondered why soundproofing foam doesn’t solve your noise issues? The secret isn’t just in absorbing sound — it’s about putting distance and smart placement between you and the machine. Moving a noisy workstation into another room, especially a closet or basement, can make your workspace eerily quiet, even if the rig itself roars. Learn more about acoustic dampening, placement, and the ‘Rig in the Closet’ setup.
This article reveals the real power moves: how placement beats foam, why ventilation is crucial in closet setups, and how to balance noise control with cooling. Whether you’re running a GPU-heavy AI model or just want a peaceful workspace, understanding these principles saves money, effort, and frustration.
Acoustic dampening
& the rig in the closet.
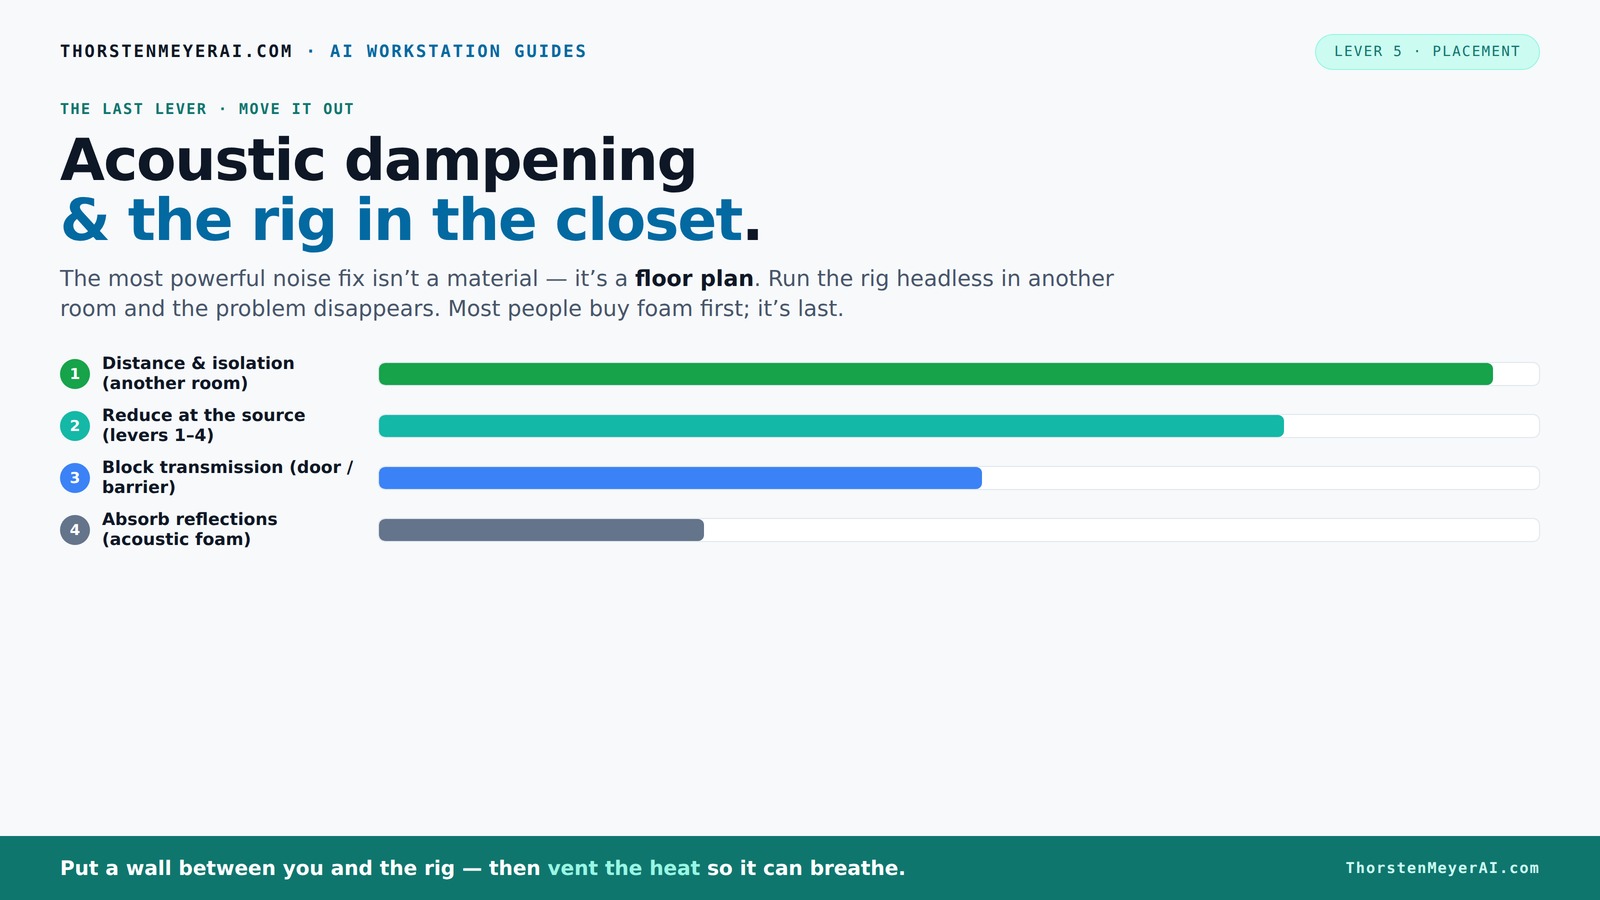
The most powerful noise fix isn’t a material — it’s a floor plan. A rig you can’t hear because it’s in another room beats any amount of foam. Tap the approaches in Part 1 to see what actually works.
(another room)
(levers 1–4)
(door / barrier)
(acoustic foam)
Contain the noise, not the heat
Key Takeaways
- Distance your rig from your workspace whenever possible; it’s the most effective noise reduction method.
- Proper ventilation is essential if placing a high-power rig in a closet — passive vents plus quiet fans keep temps safe.
- Acoustic dampening controls reflections inside the space, but soundproofing prevents sound leakage — both are needed for best results.
- Targeted placement of acoustic panels and bass traps in a closet improves sound quality without costly upgrades.
- Sealing gaps and using simple barriers like blankets or foam can drastically reduce noise leaks in small spaces.
AJAZZ Privacy Curtains for Room Divider with Blackout & Soundproof (Grey, W100 x L96 in, 1 Panel)+ No Drill Curtain Rods(H) 43-120×(W) 35-100 in, Wall Divider for Bedroom/Studio/Office Curtain
Privacy & Blackout: AJAZZ room divider curtain 100 % blackout curtains, studio or office into an instant private...
As an affiliate, we earn on qualifying purchases.
As an affiliate, we earn on qualifying purchases.
Why Distance Trumps Foam for Noise Control
Distance is the single most effective way to reduce noise from your AI rig. Think of it like a loudspeaker: the farther away you are, the quieter it sounds. A GPU tower in another room, connected via fast Ethernet or Wi-Fi, can be silent for your ears. This simple move often beats spending hundreds on acoustic foam or soundproofing materials.
Imagine you’re working at your desk, and your GPU rig is in the basement. You won’t hear its fan hum unless you stick your head in the door. Even a modest 10-15 foot gap can cut noise levels by over 50%. That’s real value, especially since most AI workloads are accessed remotely anyway.
According to experts, this is the most efficient fix. The noise you hear is mostly airborne, and the farther it travels, the weaker it gets. Plus, you avoid the heat buildup issue that comes with enclosed spaces.

Rosewill Helium NAS Black ATX Mid Tower Computer Case, Mesh Panel, 4X 140mm PWM Fan, Ideal for DIY NAS, Media Servers, or Small Business Applications
Maximized Airflow: All-mesh side panels allow for unrestricted airflow, ensuring optimal cooling performance and preventing thermal throttling of...
As an affiliate, we earn on qualifying purchases.
As an affiliate, we earn on qualifying purchases.
The 'Rig in the Closet' Setup — How It Works (and Its Big Caveat)
Placing your rig inside a closet or cabinet is a popular way to mute its noise. The dense walls and doors dampen sound, creating a near-silent environment. But here’s the catch: a sealed space traps heat. Without proper airflow, your high-power GPU can overheat in less than an hour, throttling performance and risking damage. Learn more about acoustic dampening, placement, and the 'Rig in the Closet' setup.
For example, a 600W GPU in a sealed closet without ventilation can see internal temperatures spike by 20°C or more in just 30 minutes. This rapid temperature increase isn’t just a minor inconvenience; it directly impacts your hardware's longevity and performance. Overheating causes thermal throttling, which reduces the GPU’s clock speeds to protect itself, ultimately negating the noise reduction benefit. The tradeoff here is clear: silence at the cost of potential hardware damage or significant performance loss.
To make a closet work effectively, you need a ventilation system. A simple passive vent might help, but a quiet exhaust fan pulling hot air out and drawing cooler air in is better. Advanced solutions include purpose-built soundproof cabinets with ducted airflow and thermostatic controls. Learn more about managing heat and noise in compact setups.

Easy Cloud Computer Fan with AC Plug, 120mm Variable Speed Axial Muffin PC Fan with Controller 120V 110V 220V Small 12V Case Cooling for PC Server Cabinet DVR TV Router Receiver Xbox Greenhouse
【Speed Controllable】Easy Cloud axial fan 120v allows you to freely adjust the computer cooling fan speed according to...
As an affiliate, we earn on qualifying purchases.
As an affiliate, we earn on qualifying purchases.
How to Ventilate a Closet Rig Without Losing Silence
Proper ventilation is the key to a successful 'rig in the closet.' Here’s a quick step-by-step: Learn more about acoustic dampening, placement, and the 'Rig in the Closet' setup.
- Install a passive vent or duct in the closet door or wall. Make sure it’s sealed around the edges to prevent sound leaks. This allows airflow but not noise to escape.
- Add a quiet, thermostatically controlled exhaust fan. Look for low-noise models designed for server or audio use. Selecting a fan with adjustable speed helps balance airflow with noise levels.
- Use ducting to direct hot air outside or into a well-ventilated space. The goal: keep the interior temperature stable, ideally below 30°C, which requires careful planning of airflow paths.
- Seal all gaps, outlets, and cracks with weatherstripping or acoustic sealant. Every leak is a noise escape route, undermining your soundproofing efforts. Learn more about acoustic dampening, placement, and the 'Rig in the Closet' setup.
- Monitor temperatures regularly. If the closet warms up, increase airflow or add more cooling capacity. Incorporating temperature sensors linked to your fan control can automate this process.
For best results, consider a purpose-built soundproof cabinet with ducted airflow, which balances noise reduction and heat dissipation. Read about specialized enclosures for silent and cool operation.

Knightsacoustic 96 Pack Sound Proof Foam Panels for Walls, 1 X 12 X 12 Inches Acoustic Foam Panels, High Density Acoustic Panels Sound Absorbing, Black Noise Cancelling Studio Wedges(NOT ADHESIVE)
PROFESSIONAL SOUND ABSORBING PROPERTIES – Our acoustic foam panels are expertly designed to reduce noise pollution by absorbing...
As an affiliate, we earn on qualifying purchases.
As an affiliate, we earn on qualifying purchases.
Acoustic Dampening vs. Soundproofing — Know the Difference
People often confuse damping and soundproofing, but they serve different purposes, and understanding these differences is crucial for effective noise management. Acoustic dampening involves adding materials that absorb sound waves within a space, reducing echoes and internal reflections. This improves clarity and prevents sound from bouncing around harshly, which is especially important if you record or broadcast from your closet. It’s about controlling the internal acoustic environment to make sound clearer and more natural. Learn more about acoustic dampening, placement, and the 'Rig in the Closet' setup.
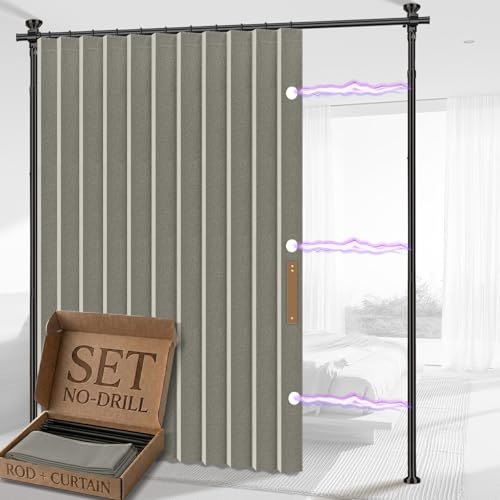
Soundproofing, on the other hand, is about preventing sound from escaping or entering the space. It involves adding mass, sealing gaps, and using barriers to block noise transmission. This is essential when you want to contain the noise of your rig within the closet or prevent external sounds from intruding. Both strategies are complementary: damping improves internal sound quality, while soundproofing minimizes noise leakage.
In a small closet, both are valuable but serve different goals. Use damping materials like foam panels or bass traps to improve sound clarity during recording or streaming. Simultaneously, seal gaps and add mass to contain the noise, especially if your rig is loud enough to disturb others. Recognizing this distinction helps you prioritize upgrades based on your specific needs and avoid wasting money on unnecessary materials.
Learn how to blend these strategies effectively.
Placement Tips for a Closet Microphone and Acoustic Treatment
Where you position your microphone and acoustic panels significantly impacts sound quality. Proper placement minimizes reflections, echoes, and low-frequency buildup, which can muddy recordings. Start by placing your microphone at an optimal distance—about 6-12 inches from your mouth—and facing away from reflective surfaces like clothing, walls, or metal racks. This reduces the chance of capturing unwanted room reflections that color your sound.
Use the 'mirror trick' to identify first reflection points: have someone hold a mirror against the wall while you sit at the mic, and mark where you see the reflection. Place absorption panels at these points to absorb direct reflections, which are often the most problematic. In a closet, focus on covering surfaces that reflect sound back into the mic, such as behind and beside it, and in corners where low frequencies tend to accumulate.
Adding bass traps in the corners helps control low-end buildup, which is especially important in small, enclosed spaces. Covering reflective surfaces like clothing racks with blankets or foam further reduces echo and improves clarity. This targeted approach ensures you get better sound quality without overloading the space with unnecessary material, making your recordings cleaner and more professional.
Do You Really Need Bass Traps in a Small Closet?
Bass traps are essential in small, enclosed spaces because low frequencies tend to amplify and create a boomy, muddy sound. In a tiny closet, parallel walls and tight corners cause low-frequency standing waves, which can make recordings sound imprecise and unprofessional. Installing bass traps in the corners absorbs these low-end resonances, providing a clearer, tighter sound. This is especially important if you record vocals or instruments where low frequencies are prominent, as untreated bass buildup can obscure detail and reduce clarity.
The physics behind this is that low frequencies have longer wavelengths, making them prone to standing waves in small, reflective spaces. Bass traps made of dense mineral wool or foam are designed to absorb these wavelengths effectively. By strategically placing them in the corners where low-frequency energy concentrates, you prevent the buildup that causes muddiness. This leads to more accurate monitoring and better-quality recordings. Neglecting bass trapping in a small space often results in a less controlled acoustic environment, which hampers your ability to produce professional-sounding audio.
Simple Upgrades That Make a Big Difference in a Closet Setup
If you’re on a budget, small tweaks can significantly improve your sound and noise control. Sealing gaps around the door with weatherstripping or draft stoppers prevents sound leaks that undermine your acoustic treatment and noise reduction efforts. Covering reflective surfaces like clothing racks or walls with thick blankets, moving pads, or foam panels helps absorb sound reflections, reducing echo and improving clarity. Placing foam panels at reflection points—such as behind the mic or on side walls—targets the main sources of unwanted reflections, making your recordings cleaner without extensive material use.
Adding a quiet, thermostatically controlled exhaust fan prevents heat buildup, maintaining optimal operating temperatures and extending hardware lifespan. Positioning your microphone carefully—facing away from reflective surfaces and clothing racks—reduces the capture of unwanted room noise, improving recording quality. These simple, low-cost modifications create a more controlled acoustic environment and keep your rig cool, all without breaking the bank. When combined, they significantly enhance both sound quality and thermal management, making your small space more functional and professional.
Frequently Asked Questions
What’s the difference between acoustic treatment and soundproofing?
Acoustic treatment reduces echoes and reflections inside a space, making sound clearer. Soundproofing blocks sound from entering or leaving, preventing noise leakage. For a closet rig, use both: dampen reflections and seal gaps for best results.
Where should I place acoustic panels in a closet setup?
Place panels at first reflection points, usually the side walls facing the mic, and behind the mic. Use bass traps in corners to tame low frequencies. This targeted approach improves clarity without over-cluttering the space.
Do I need bass traps in a small closet?
Yes, bass traps are crucial in small spaces. They absorb low-frequency build-up in corners, preventing muddiness and making your recordings sound tighter and more professional.
Can I make a closet booth with blankets instead of panels?
Absolutely. Thick blankets and moving pads can absorb reflections and reduce echo. While not as precise as acoustic panels, they’re a cost-effective way to improve sound quality quickly.
How do I stop sound from leaking through the closet door?
Seal gaps around the door with weatherstripping or draft stoppers. Adding a heavy blanket or acoustic curtain over the door can also significantly cut noise leaks.
Conclusion
The real game-changer isn’t just stuffing a closet with foam or sealing cracks — it’s about smart placement, ventilation, and understanding what noise control really involves. If you keep your rig in a different room or closet with proper airflow, you’ll gain a quiet workspace without sacrificing performance.
Imagine your AI rig humming away in a cool, ventilated closet, silent as a whisper. That’s the power of combining placement with smart airflow. Remember: the best noise control is often the simplest — just put some distance and breathe easy.